Monday, September 26, 2011

Guest: Louis A Tamasi at The Vintage Recipe and his Angel Food Cale

Let's welcome Louis A Tamasi at The Vintage Recipe he will be sharing one of his recipes with us. Enjoy!
                                     
1937 Baker's Cocoa
I'm going to tell you right from the start my expertise in cooking is  main dishes and sauces along with baking breads. This dessert thing is  new for me. The Butterscotch cake came out ok and on the heels of that I  tracked down this 1937 ad for Baker's Cocoa. It gives you 2 cake  recipes both involving 8 eggs. The ingenious thing was one cake is for 8  egg whites (the Angel Food Cake) and a Black Eyed Susan cake which uses  the egg yolks. Right now, it's just dad and me living in the house so  we really don't need 1 cake let alone 2 hanging around but I had a use in mind for the yolks so no big deal.

So here's the recipe:

Angel Food Cake

8 Egg Whites (1 Cup)
1 C Cake Flour
1/4 tsp Salt
1 tsp Cream of Tartar
1 1/4C Sifted Sugar
3/4 tsp Vanilla Extract
1/4 tsp Almond Extract

Sift the flour 4 times and set aside. Combine egg whites and salt and  beat until foamy, add cream of tartar. Beat until stiff peaks. Fold in  sugar a little bit at a time. Add vanilla and almond then sift flour  over a little at a time folding it in. Pour batter into ungreased angel  food cake pan and bake at 275° for 30 mins, then increase temp to 325° and bake 20 mins more until knife inserted is clean. Flip pan over and  let cool completely before removing cake.


Melt 3 squares baker's chocolate over double boiler. Add 1 1/2C  powdered sugar and mix until combined.  Add 3T BOILING water and 4T  butter and stir until combined. remove from heat and cool then add 1t  vanilla extract.

You can see the final product above, but wait it's not as tall as the ad. Yep, I muffed it. The recipe, as most antiquated recipes are, is rather vague on the stiff peaks part, instead calling for just peaks. I took it to soft peaks and was rewarded with a shorter cake. The frosting was a bit of pain as well because modern powdered sugar contains cornstarch to keep it from clumping. This also ups the water requirement so if your frosting comes out thick or just not right add some more boiling water while heating it over the double boiler and it will smooth out. You just need it smooth and spreadable. You can also go the route of making your own powdered icing sugar by running regular white sugar in food processor until its a powder. Make sure you sift it before use.

Despite the few road bumps I liked the outcome. The cake itself is delicate and has a slight almond taste, while the icing is a delicious dark chocolate flavor. These cakes from vintage recipes are best described as rustic. If you're searching for perfection it's just not going to happen, at least not until you get more experience.
Yield, 8 Servings
Louis, I want to thank you for sharing your Angel Food Cake recipe with us today. I looks delicious I am ready for a slice!  Hope you will come back an share another of your creations.

Patricia aka Mamaw

Friday, September 23, 2011

Finding New Friends Weekend Blog Hop #25

click on the button to link up
The linky would not fit on my page this week.

Welcome back to week 25 of Finding New Friends Weekend Blog Hop hosted by Shelly from My Saving Game and Jeannette from The Adventures of J-Man and MillerBug! J-Man and MillerBug are back from vacation and we are ready to hop! Thank you all for helping make this hop so successful! We love you tons! Now what are you waiting for? Let's get to hopping! We are finding some fabulous blogs through this hop and having a great time getting to know so many of you! So thank you for linking up again this week to those of you who are hop veterans and welcome to those who are new! Let's continue to make new bloggy friends and increase our traffic! We do have a few simple rules for you - nothing too tough though. So here we go!

1. Please follow your hostesses My Saving Game and The Adventures of J-Man and MillerBug. Leave us a comment and we will follow you back! (If you already follow us on GFC, we'd LOVE it if you would follow us on Facebook or Twitter.)
2. Please follow our guest co-host who this week are Kadie from Seven Alive.
3. You don't have to post our button but we sure would like it if you did. Not only does it help our hop grow so we can all get new followers, but each week we will choose a guest co-host and to be considered you must have our button somewhere on your site! If you post our button and want to be considered for guest co-host, please email me at jmanandmillerbug@gmail.com to express your interest.
4. You can link up blogs, facebook, twitter accounts, whatever - just be sure to specify what each link is.
5. Hop around and find blogs that you enjoy. Be sure to tell them you are following them from Finding New Friends Weekend Blog Hop so they can follow you back!
6. Have fun!

Wednesday, September 21, 2011

Funny money found at suspected drug lab - Your Houston News: News

We live way out in the country and we have three neighbor within a mile of us.  On Sept 15th one of those close neighbors were arrested I couldn't believe all of the police cars I know there was over ten cars.  The man that owns the house just lost his wife in a car wreck last year while he was working out of the country.  Now his step son does something stupid like this in his home while he is in Maylasia working.  It will take him three days to home. He is concerned about his pets.  When he called me I reasurred him I would check on his animals that his son was suppose to be caring for.  I feel so sorry for this man please pray for him he has had to go through way to much.  Even though his step son is a criminal please pray that he will turn away from this mess he has gotten into. I got this article from the Avocate News.

Funny money found at suspected drug lab - Your Houston News: News: An alleged counterfeit money and illegal drug operation was
busted on Sept. 15 in a joint effort by San Jacinto County and
Liberty County law …

Tuesday, September 20, 2011

Guest: Kim T.@Camisoles & Cammies - Gnome Hat Tutorial


Let's welcome Kim T.@Camisoles & Cammies to It's About Time Mamaw's. She is going to share one of her tutorials with us today.  Enjoy and be sure to leave her a comment.

My PhotoPhotobucket
A little about me..


I am a 25 year old Momma to three amazing kiddos (7, 4 and 1) and the wife to a super handsome Marine! We are stationed in Oahu, Hawaii right now, but are both originally from Michigan. I have many newfound hobbies since we've moved here - hiking, snorkeling, sewing and crafting and of course this blog. I've always wanted to be a mommy, it's the only thing I've ever been sure of and my kids are my life!


Girly Gnome Hat (Halloween Costume Part 1)

Halloween is getting near! If you are planning to make your own costumes or decorations you realize it is a lot closer than you would think. Little Ava is going to be a girly garden gnome this year and I decided to put my skills to work, save myself some money and have fun making her costume myself.

Originally I had planned on making her hat out of felt, which ideally would have been easier since it doesn't fray so you don't have to worry about finishing off raw edges and it is stiff so it would stand on it's own. They didn't have the colors I wanted so I opted to go with another fabric which requires work to finish the edges and some serious starching to make it stiff, but is totally worth the extra work!


Materials:
Felt or similar fabric of your choice
Basic sewing supplies/ machine
Measure Tape - the bendy seamstress kind
Freezer paper (or other paper large enough to draw your pattern on)
Spray Starch

Instructions:
The very first thing you are going to do is get your measurements. Decide how tall you want your hat to be and measure the circumference of your little one's head. 

My daughter's head is 18" around. To make your pattern, you are going to cut that number in half (9" for me) and add your seam allowance plus about a 1/4" so the hat doesn't fit too snug. 

Once you have figured your measurements, you are going to draw your pattern. I like to use the paper side of freezer paper to draw mine but you can use whatever you like. First you are going to make a straight line across the bottom that is your circumference+seam allowance+1/4" to reduce snugness. Mine came out to about 9.5". Next, measure up about 1.5" and make a line on each side going up. This is so you can make a hem while still keeping the measurement you need. From that point measure up how tall you want your hat to be (9" for me) and place a dot at that point. Next draw your basic hat shape, with the top of it ending even with your dot. If none of this is making sense please refer to the photo (click on it to make it larger.)


Once you have your pattern made you are going to cut two pieces of fabric from it.

Pin them right sides together, leaving the bottom unpinned.

Sew the two pieces together. Do not sew the bottom closed. That is the opening of your hat.


Snip into the fabric along the curves and around the rounded top of the hat being careful not to get your stitches. This will help it all lay right when turned right side out.

If you did not use felt and need to finish off your bottom edge you need to do the next step. If you did use felt, you can leave it as is.

You need to make the brim(?) of the hat next. I made mine 3 inches tall by 19 inches wide. To figure this you need to use the following formula (circumference + 1/4" on each side so 1/2" + 1/4" seam allowance on each side so 1/2").

Cut this strip of fabric and make it into a tube by stitching the two 3" sides together using the 1/4" seam allowance. Turn it right side out.

With your hate still inside out and your 'brim' right side out. You are going to slide the hat into the circle of the brim, lining up the edges. Pin it in place all the way around the circle opening of the hat.


Working around the circle opening, stitch the brim onto the hat. Fold it open and it should look like this: 


Fold the brim up 3 folds so the raw edge is hidden inside of the folds. Make sure it is folded evenly all  the way around and then make a small stitch to tack it in place on each side of the hat (not the front/back).


Now, if you used a fabric that is not stiff and your hat is floppy, you will want to starch it. I used spray starch and gave it a good coat, then took the blowdryer to it til it dried on. I did a few coats to get it really stiff. The starch did make my hat turn purple while I was drying it but once it was dry it turned it's original hot pink again! Just a warning.

If you'd like you could make felt flowers or other embellishments to glue/sew on! I made a big felt flower.

And here is your finished product:


My model does not like anything on her head! Good thing I have over a month to convince her she wants to wear it because it is oh so adorable. We may have a hat-less gnome for Halloween :/


Kim, I would like to thank you for sharing this darling little Halloween Costume Girly Gnome Hat with us today.  Hope to have you back for more of  your tutorials.  This was really fun!

Patricia aka Mamaw

Sunday, September 18, 2011

SUNDAY MEME: MAMAW'S SUNDAY DEVOTIONAL 9/18/1011

I feel very inspired since I did a review on The Grandmother's Bible/Daily Devotional.Here is a new meme I have come up with. You will choose a scripture from the Bible and tell us how you will apply it to your daily life by posting it on you blog with this meme. Calling it Mamaw's Sunday Devotional. You could even add your scripture to the header of your blog, optional, for the week as a reminder of your devotion.


PROVERBS 15:13
A happy heart makes the face cheerful, but heartache crushes the spirit.

I know we all feel as if our spirit has been crushed. The more we feed into to the heartache it turns into bitterness. We must ask God to heal our heartache and give us a cheerful spirit. Look at the difference in this young man in the many stages of heartache. You can see a variety of reactions in his face. We may not be aware but people can see the change in us when we don't turn our problems over to God. So I will ask God to remove the heartache before it has time to feed on my spirit.


Keil and Delitzsch Biblical Commentary on the Old Testament A joyful heart maketh the countenance cheerful;
But in sorrow of the heart the spirit is broken.
The expression of the countenance, as well as the spiritual habitus of a man, is conditioned by the state of the heart. A joyful heart maketh the countenance טוב, which means friendly, but here happy-looking equals cheerful (for טוב ro is the most general designation of that which makes an impression which is pleasant to the senses or to the mind); on the contrary, with sorrow of heart (עצּבת, constr. of עצּבת, Proverbs 10:10, as חטאת equals חטּאת, from חטּאה) there is connected a stricken, broken, downcast heart; the spiritual functions of the man are paralyzed; self-confidence, without which energetic action is impossible, is shattered; he appears discouraged, whereby רוּח is thought of as the power of self-consciousness and of self-determination, but לב, as our "Gemt" [animus], as the oneness of thinking and willing, and thus as the seat of determination, which decides the intellectual-corporeal life-expression of the man, or without being able to be wholly restrained, communicates itself to them. The ב of וּבעצּבת is, as Proverbs 15:16., Proverbs 16:8; Proverbs 17:1, meant in the force of being together or along with, so that רוּח נכאה do not need to be taken separate from each other as subject and predicate: the sense of the noun-clause is in the ב, as e.g., also Proverbs 7:23 (it is about his life, i.e., it concerns his life). Elsewhere the crushed spirit, like the broken heart, is equivalent to the heart despairing in itself and prepared for grace. The heart with a more clouded mien may be well, for sorrow has in it a healing power (Ecclesiastes 7:3). But here the matter is the general psychological truth, that the corporeal and spiritual life of man has its regulator in the heart, and that the condition of the heart leaves its stamp on the appearance and on the activity of the man. The translation of the רוח נכאה by "oppressed breath" (Umbreit, Hitzig) is impossible; the breath cannot be spoken of as broken.

Thursday, September 15, 2011

Finding New Friends Weekend Blog Hop #24


Welcome back to week 24 of Finding New Friends Weekend Blog Hop hosted by Shelly from My Saving Game and Jeannette from The Adventures of J-Man and MillerBug!  J-Man and MillerBug are back from vacation and we are ready to hop!  Thank you all for helping make this hop so successful!  We love you tons!  Now what are you waiting for?  Let's get to hopping!  We are finding some fabulous blogs through this hop and having a great time getting to know so many of you!  So thank you for linking up again this week to those of you who are hop veterans and welcome to those who are new!  Let's continue to make new bloggy friends and increase our traffic! We do have a few simple rules for you - nothing too tough though.  So here we go!

Wednesday, September 14, 2011

Gabby, God's Little Angel


More about Gabby:
This first book in a delightful new series offers a comforting message for young readers-God loves you very much and is always watching over you!

What little girl wouldn't love her very own guardian angel? Parents and children alike will be won over by this humorous tale of Gabby, a guardian angel in training who has much to learn about taking care of God's little ones. Her new assignment is to protect a young girl named Sophie, but Gabby soon realizes that watching after Sophie is a bigger challenge than she had expected! After a close call while riding her pony, Sophie learns what the Bible says about guardian angels: "He will put his angels in charge of you. They will watch over you wherever you go" (Psalm 91:11 ICB).

I set out to develop a new character that young readers would embrace and delight in, and out from my pen and from my heart poured a new series, Gabby, God’s Little Angel. Gabby is an adorable guardian angel in training who finds that she has so much to learn about taking care of God’s children.

I am so passionate about teaching the little angels in your own lives just how much God loves them. I pray that through my new little friend, Gabby, they will discover this truth and rest assured that He is always watching over them!

Friday, September 9, 2011

Finding New Friends Weekend Blog Hop #23 Honor 9/11

LET'S HONOR 9/11


Image via Wikipedia
What were you doing the day this happened?

I was getting ready for work as it started and was at work all day trying to hold myself together as everyone else around me was doing the same.  I pray for everyone and our country as we remember that earth shattering day ten short years ago. 


Welcome back to week 23 of Finding New Friends Weekend Blog Hop hosted by Shelly from My Saving Game and Jeannette from The Adventures of J-Man and MillerBug! J-Man and MillerBug are back from vacation and we are ready to hop! Thank you all for helping make this hop so successful! We love you tons! Now what are you waiting for? Let's get to hopping! We are finding some fabulous blogs through this hop and having a great time getting to know so many of you! So thank you for linking up again this week to those of you who are hop veterans and welcome to those who are new! Let's continue to make new bloggy friends and increase our traffic! We do have a few simple rules for you - nothing too tough though. So here we go!

1. Please follow your hostesses My Saving Game and The Advetures of J-Man and MillerBug. Leave us a comment and we will follow you back! (If you already follow us on GFC, we'd LOVE it if you would follow us on Facebook or Twitter.)
2. Please follow our guest co-host who this week are Joanna & Yussie from Montreal Fashion Moms.
3. You don't have to post our button but we sure would like it if you did. Not only does it help our hop grow so we can all get new followers, but each week we will choose a guest co-host and to be considered you must have our button somewhere on your site! If you post our button and want to be considered for guest co-host, please email me at jmanandmillerbug@gmail.com to express your interest.
4. You can link up blogs, facebook, twitter accounts, whatever - just be sure to specify what each link is.
5. Hop around and find blogs that you enjoy. Be sure to tell them you are following them from Finding New Friends Weekend Blog Hop so they can follow you back!
6. Have fun!

It's Time To Read Mamaw: Review - The Hope of Refuge by Cindy Woodsmall

It's Time To Read Mamaw: Review - The Hope of Refuge by Cindy Woodsmall: The Hope of Refuge (Ada's House #1) by Cindy Woodsmall GOODREADS 4.09 · rating details · 276 ratings · 62 reviews Raised in fos...

Sunday, September 4, 2011

SUNDAY MEME: MAMAW'S SUNDAY DEVOTIONAL

I feel very inspired since I did a review on The Grandmother's Bible/Daily Devotional.Here is a new meme I have come up with.  You will choose a scripture from the Bible and tell us how you will apply it to your daily life by posting it on you blog with this meme.  Calling it Mamaw's Sunday Devotional. You could even add your scripture to the header of your blog, optional, for the week as a reminder of your devotion.

SERMON ON THE MOUNT


My Scripture for the week:
MATTHEW 6:27  "Who of you by worrying can add a single hour to his life?"

How I can apply this scripture to my daily life this week?
I tend to be guilty of this.  Every time I begin to worry about the my family, finances or even the weather I will remember this scripture and ask myself this question.  I know a lot of people have created health problem in themselves due to worries in their life.
Lord, I lay my worries at the foot of the Cross.   


Barnes' Notes on the Bible
Which of you, by taking thought - The third argument is taken from their extreme weakness and helplessness. With all your care you cannot increase your stature a single cubit. God has ordered your height. Beyond his appointment your powers are of no avail, and you can do nothing. So of raiment. He, by His providence, orders and arranges the circumstances of your life. "Beyond" that appointment of His providence, beyond his care for you, your efforts avail nothing. Seeing, then, that he alike orders your growth and the supply of your needs, how obvious is the duty of depending upon him, and of beginning all your efforts, feeling that He only can grant you the means of preserving life.
One cubit - The cubit was originally the length from the elbow to the end of the middle finger. The cubit of the Scriptures is not far from 22 inches. Terms of "length" are often applied to life, and it is thought by many to be so here. Thus, it is said, "Thou hast made my days as a handbreadth" Psalm 39:5; "Teach me the measure of my days" Psalm 39:4. In this place it is used to denote a "small length." You cannot increase your stature even a cubit, or in the smallest degree. Compare Luke 12:26.
Stature - This word means "height." The original word, however, means oftener "age," John 9:21; "He is of age;" so also John 9:23. If this be its meaning here, as is probable (compare Robinson, Lexicon), it denotes that a man cannot increase the length of his life at all. The utmost anxiety will not prolong it one hour beyond the time appointed for death.

Friday, September 2, 2011

Thursday, September 1, 2011

Winner of the Favorite Craft Tutorial is Amanda at Ninth Street Notions

Congratulations Amanda you had the most comments and you have won the prize package! Let's check out your tutorial again today.


Hi everybody! I'm Amanda, from Ninth Street Notions. I like to share fun crafts, sewing projects, and recipes on my blog. Feel free to come check me out sometime.


Up until last winter I didn't even know how to sew a button. If I got a tear in something or lost a button, I just got a new item of clothing.

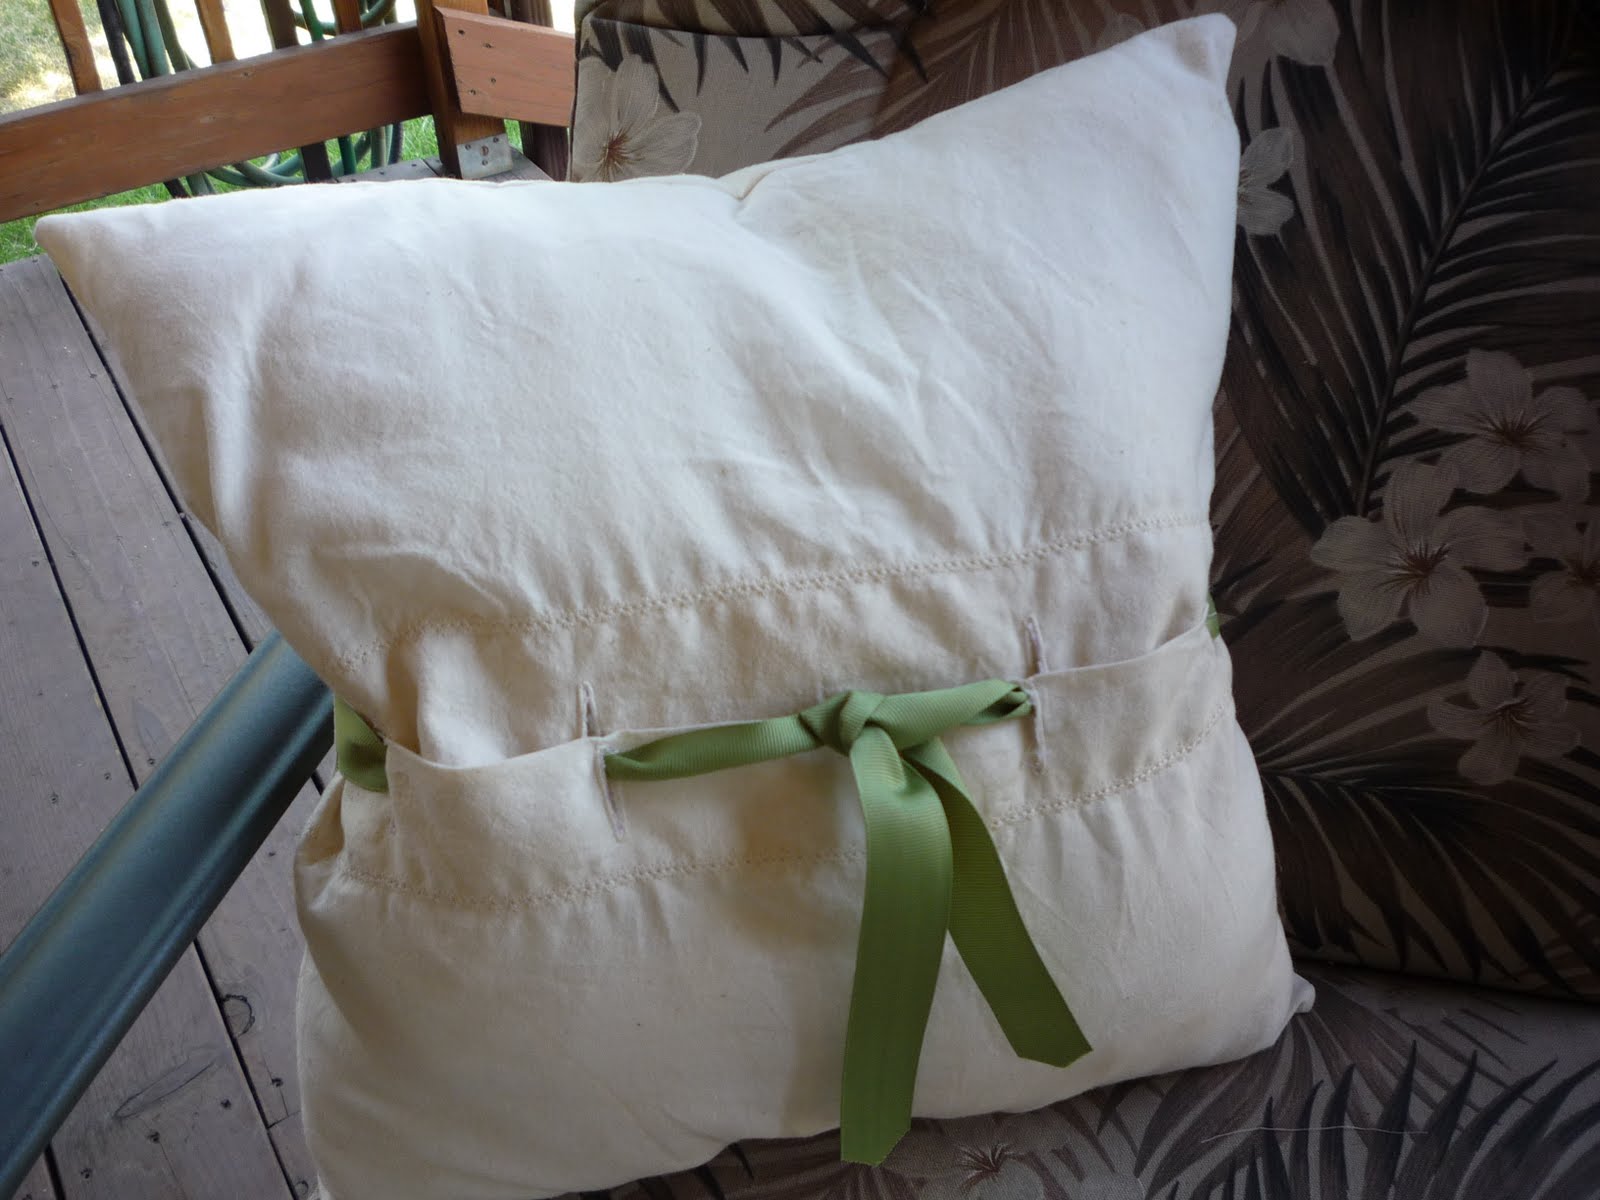
But I got tired of not being able to find clothes that I liked and that fit. So I decided to learn to sew, so I could make my own clothes. That led to me learning to make various other items for around the house, like this pillow.


I developed this idea after seeing a little girl's dress that had a cute little ribbon and buttonhole detailing around the collar. I wanted to use that same look for other things. Here are the directions for making your own. This project is great because you can change up the ribbon to match your decor.


Gather your materials:

(1) 17"x17" piece of muslin
(2) 17"x10.5" pieces of muslin
(2) 24"x7/8" pieces of ribbon
polyester stuffing
(the muslin pieces can easily be cut out of 1 yard of fabric)


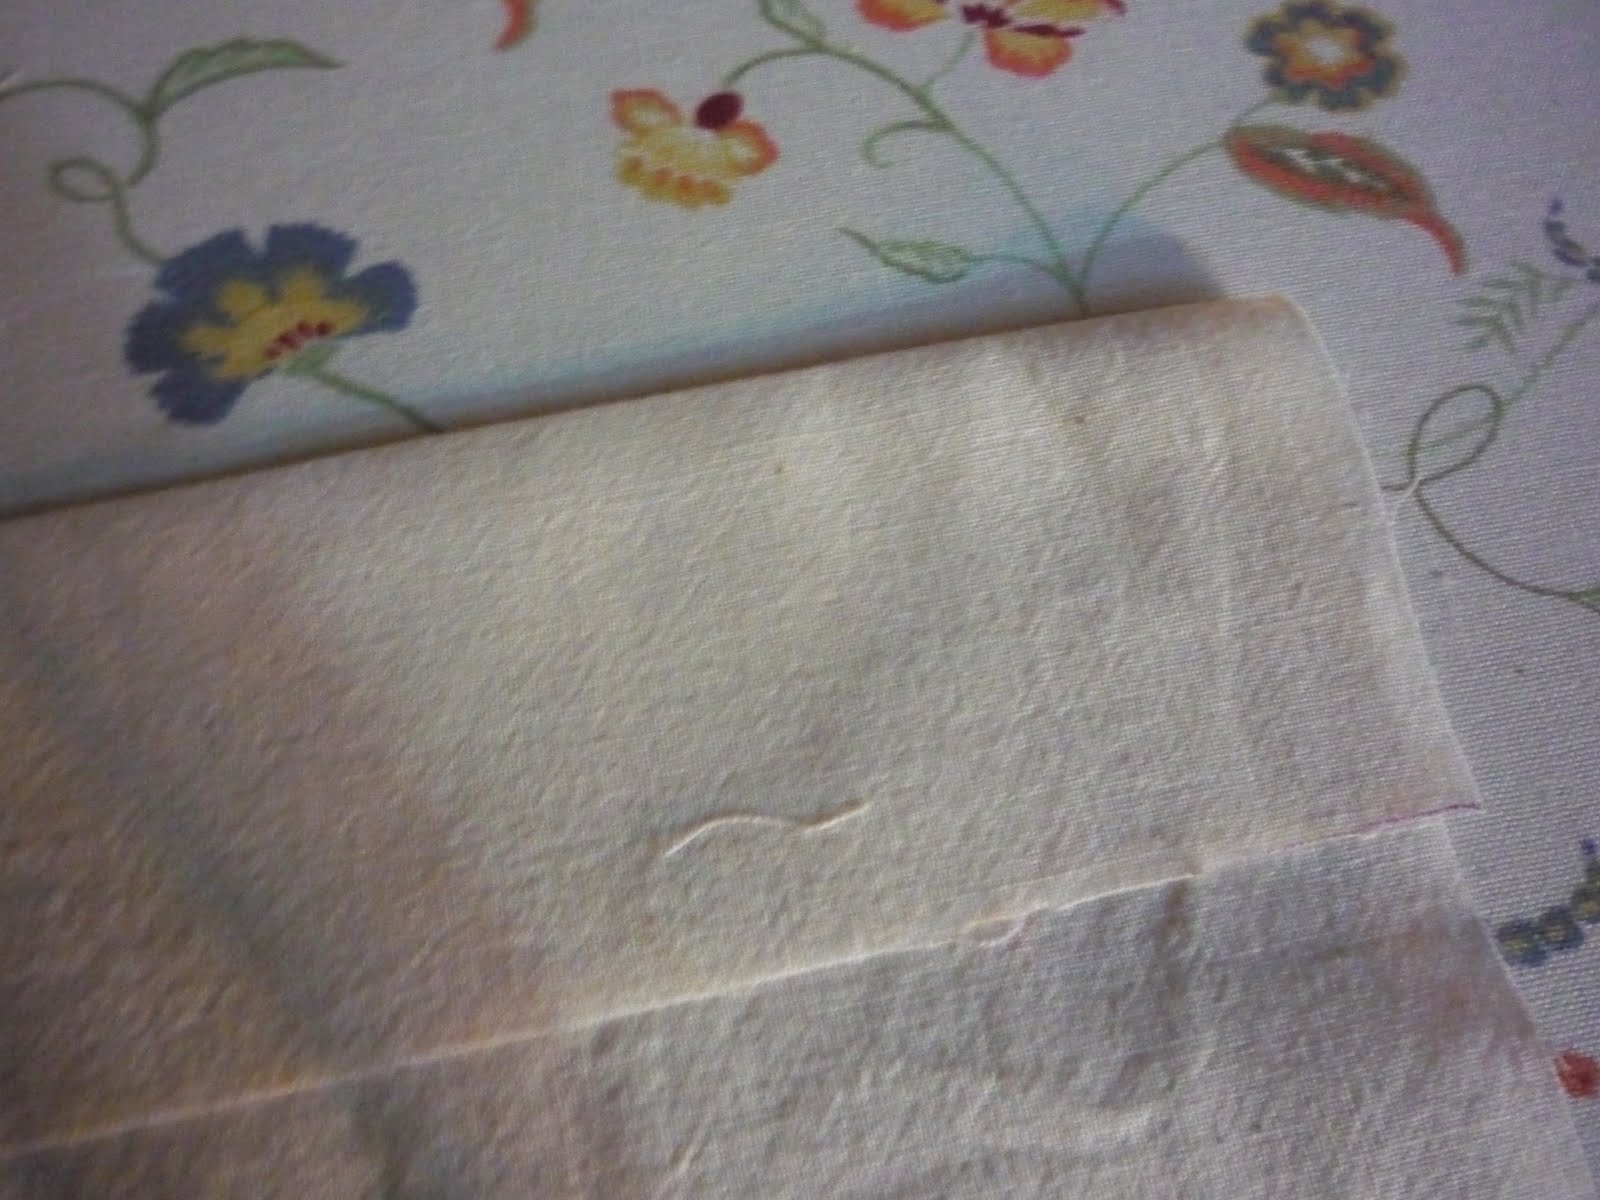
On each of the smaller muslin pieces, fold down 2" on the long edge and press. They should now be 17"x8.5".


Along the raw edge use a decorative stitch or zigzag, depending on your machine's capabilities. This will secure the folded section. Repeat for the other small muslin piece.


Place a ruler along the edge of these pieces. Mark a 1" line at the 3", 6", 11", and 14" spots, in between the fold and decorative stitch. Repeat for the other small piece.


Use your machine's button hole function to sew a buttonhole over each of these lines. Carefully tear out the center using a seam ripper. Repeat for the other small piece.


Attach the two smaller pieces to each other, both pieces right side up. Carefully line up the buttonholes on each piece. Pin together, so you don't lose the placement.


Now lay the ribbons over the buttonholes. Leave a small section hanging out on the edges. Lay the large muslin piece right side down over the ribbon. Pin together.

Sew all around the edge using a 1/4" seam allowance. Clip the corners and turn through the center gap. Poke out the corners. Fill with stuffing.


Run the ribbon through the button holes. You will probably need to push the stuffing and pull the two front pieces a little bit to get the placement correct.


Finish with a little decorative knot or a bow. If you would like longer tails on the bow, make your ribbon pieces longer.

Thanks for letting me share this easy project with you!

Amanda I want to thank you for entering the contest and sharing this great tutorial with us. Congratulations!

Patricia aka mamaw


AMANDA HAS WON THIS PRIZE PACKAGE

Here are the prizes Amanda has won:

SPONSORS FOR THE CONTEST AND THEIR DONATION TO OUR WINNER  AMANDA  @  NINTH STREET NOTIONS

Patricia at IT'S ABOUT TIME MAMAW and IT'S ABOUT TIME MAMAW on ETSY
Donating set of 3 Baby Burp Cloths value $18
Nancy at StylenDecorDeals Donating a set of gift tags. Image is a photo of a similar set of gift tags.
Alisha at PINK POODLE BOWS and PINK POODLE BOWS on ETSY.
Donating one epatterns of the winners choice.


WENDY at STORMY WENDY MUSIC Wendy is Special Needs and does not post on her blog. Your are welcome to visit her blog.
Wendy is donating two Children's Bracelets a $12 value. Images to come.
Honey10 at 804 Rustic Lane on Etsy is where you can find one of a kind gifts, home decor and wedding decor made of wood with a rustic feel. Honey 10 will help the winner choose and customize one of the items below. What a cute way to get a message to someone.


Beth at CORKY CRAFTS on ETSY
Beth is donating a gorgeous cork star from her shop. The wrapped vines of this star reminded me of a vineyard and the beauty of the grapes and warmth of the sun. A long-lasting, festive decoration suitable for year round and a very unique wall hanging too!
This 10 inch wine cork star would be a great accent piece for wall art. This cork star is great for hostess gifts, house warming, wine tastings and perfect for small spaces that need an extra little something to spice up the wall.

Ky and Kin on Etsy will be donating a teether similar to this Plush Whale Baby Teether a $20 value.
Super plush adorable soft teal baby teether. made from pale teal cotton, detailed with a linen tag that holds the natural wooden teether. this cute little whale measures approx 7 1/2" by 3 1/2", not including the teether holder.
what baby wouldn't want a cute whale to play with and be able to soothe their teeth with an all natural wooden teether!

It's Time To Read Mamaw: Review and Q&A: Tuesday's Child by Carolyn Gibbs

It's Time To Read Mamaw: Review and Q&A: Tuesday's Child by Carolyn Gibbs: T uesday's Child by Ca rolyn Gibbs Paperback, 386 pages Published March 22nd 2011 by LegWork Team (first published March 12th 2010) ...